Monday, March 16, 2015

My Budget :) & a story

Hey Bloggers,

Today I thought I'd share with you my "Budget Envelope System" & the reason why I decided we needed one.


Once upon a few weeks ago..........
We had a cyclone called Marcia blow in for about four days.  Nothing too damaging, torrential rain & not a lot of wind where we are.  But enough rain for our back yard to flood, the pool filled up with dirt & to cap it all off the pump & chlorination system died.  We think they filled up with water & the electrics got fried.  So we had to replace them & unfortunately for us I didn't know that pools & duct-ed air conditioners (it died early in January) aren't covered by your standard house & contents insurance.  Oh no you have to get separate insurance called Motor Burn out Insurance.  Which I would have known about if I had read the hand book full of techno babble.

This will be added in November (I'm not making the same mistake twice thank you).  So we needed to come up with close to $1000 for the pool over the last few weeks.  Then last week we got a visit from the neighbours behind us about our trees along the back fence.  They want us to prune them because one of the gentlemen in his early 70's was climbing onto the top of a 6 foot ladder to prune the branches damaged & hanging over his side of the fence.  Understandably we could see where there is cause for concern.  But that means we are now up for another unexpected bill of $650 to get the trees pruned.  Which is something we where considering getting done at a much later date. Say in about 6 months or so *sigh*.  It never rains it pours around here,  Pun intended. So just after Easter (because our garden man is super busy at the moment) we are having some yard work done. Hopefully that will keep us in the good books with the neighbours.  Then I got my car (Tom the Kia) serviced & was overcharged $200 (a story for another time maybe). I had to take Tom back to Kia Maroochydore to get the door fixed (a pre-existing problem) as well as the hand brake that mysteriously stopped working after being serviced at the Nambour place I use to go.  Which was another unexpected bill of $350.00.


So of course that leads me to our new Budget.  Because I woke up one morning not long after all of this & decided I needed to calm the inner "Control Beast" by seeing where our money goes each week/month.  Plus I'm tired of being "One of those women who have no idea about the finances" as my step-mother likes to tell me not so kindly (mostly I let the comments slide, but some times they stick).

Firstly I watched a bunch of videos from You Tube on the subject.  Because lets face it - I like to find out as much as I can about things before doing them.  Remember I'm A.C.D. ;)   One video that I found particularly helpful is this one. Why?  Because of what he says near the end.  That it may take three to four months for you to perfect your budget.  That to me is the most single important piece of info that any one could have given me.  Being the type of person that I am (anal) I tend to stress if things don't go right or are perfect straight away.  By him saying this it has given me the freedom to not worry about any "mistakes" that I/we make with the budget.  Also it helps me not stress over those things that have a habit of cropping up that are out of our control - see above story (which I hate! First world problem I know).  

Now here's the fun bit.  I nagged asked Doug how much we spent on what each week/month & worked up about four budgets until I was happy with the categories and amounts (because some hubbies listening skills suck!).  Plus there is always that one thing you forget or crops up.  So here are my categories &  what I use to pay them:

My three groups are : Cash, Credit Card & Stays in bank*

Cash:

  • Groceries
  • Karate - Emsy
  • Fuel - Kia
  • Fuel - Bluey
  • Pets
  • Haircuts
  • Pool
  • Medical
  • House Upkeep
  • Car Upkeep
  • Car Rego
  • Air con
  • Clothing 
  • Birthdays
  • Christmas
  • Emergency
  • Fun 

Credit Card:

  • Optus
  • Telstra
  • House Insurance
  • Car Insurance
  • Tuckshop

Stays in bank:

  • Electricity
  • Water
  • Rates
  • Gas
  • School Fees
  • Swimming - Lilly
  • Tax
The only problem I can see with the last category is the money could "disappear" on other things.  The reason I have a Credit card & stays in bank is because these things are transferred electronically either fortnightly or monthly & I didn't want to be taking money out just to be putting it back the next week or month.  I could see payments being missed & that is not going to put me in my happy place ;p.  

** Also the telephone quote isn't something I'd do - honest.

Have a great day.


Friday, March 13, 2015

Let's talk life and the "B" word........

Hey bloggers,


I know I've slipped up in my blogging of late.  I must admit my last 3-4 posts have been scheduled.  Or they wouldn't have made it out there to 'net word'.  I know I may have said in a previous post that I wasn't going to worry so much about my blogging habits this year..............and I haven't for the most part.  Well ok that's a little lie.  I've been thinking I need to do something & not "Stressing" about it.  See I'm getting a better ;p.

So I have been busy, busy, busy with life of late & loving it.

I'm in a really good place mentally at the moment.  So am planning on taking advantage of it while this lasts.  I'm calm, happy & most importantly my mind is quiet & restful.  Which is a refreshing change that doesn't seem to happen often enough.

Yes I'm one of those "Psycho Cows" who has mood swings ranging from I will tolerate you to don't even think about looking at me or you are dead!  Add in migraines, depression & you can guess the rest...............I'm surprised my gorgeous family hasn't "killed me off" or at least kicked me out.  


March has been a busy month so far.  I've started Budgeting (hence the post title).  I woke up one morning & thought we (me) need to know where our money is going each week.  So one text later (to Doug).
Me: Honey how much do you get paid each week?
Doug: No you can't buy what ever it is.  Why do you need to know?
Me: Silly man, I'm starting a budget & need to know.
Doug: Great! Its $............ (not sharing that bit tee hee)


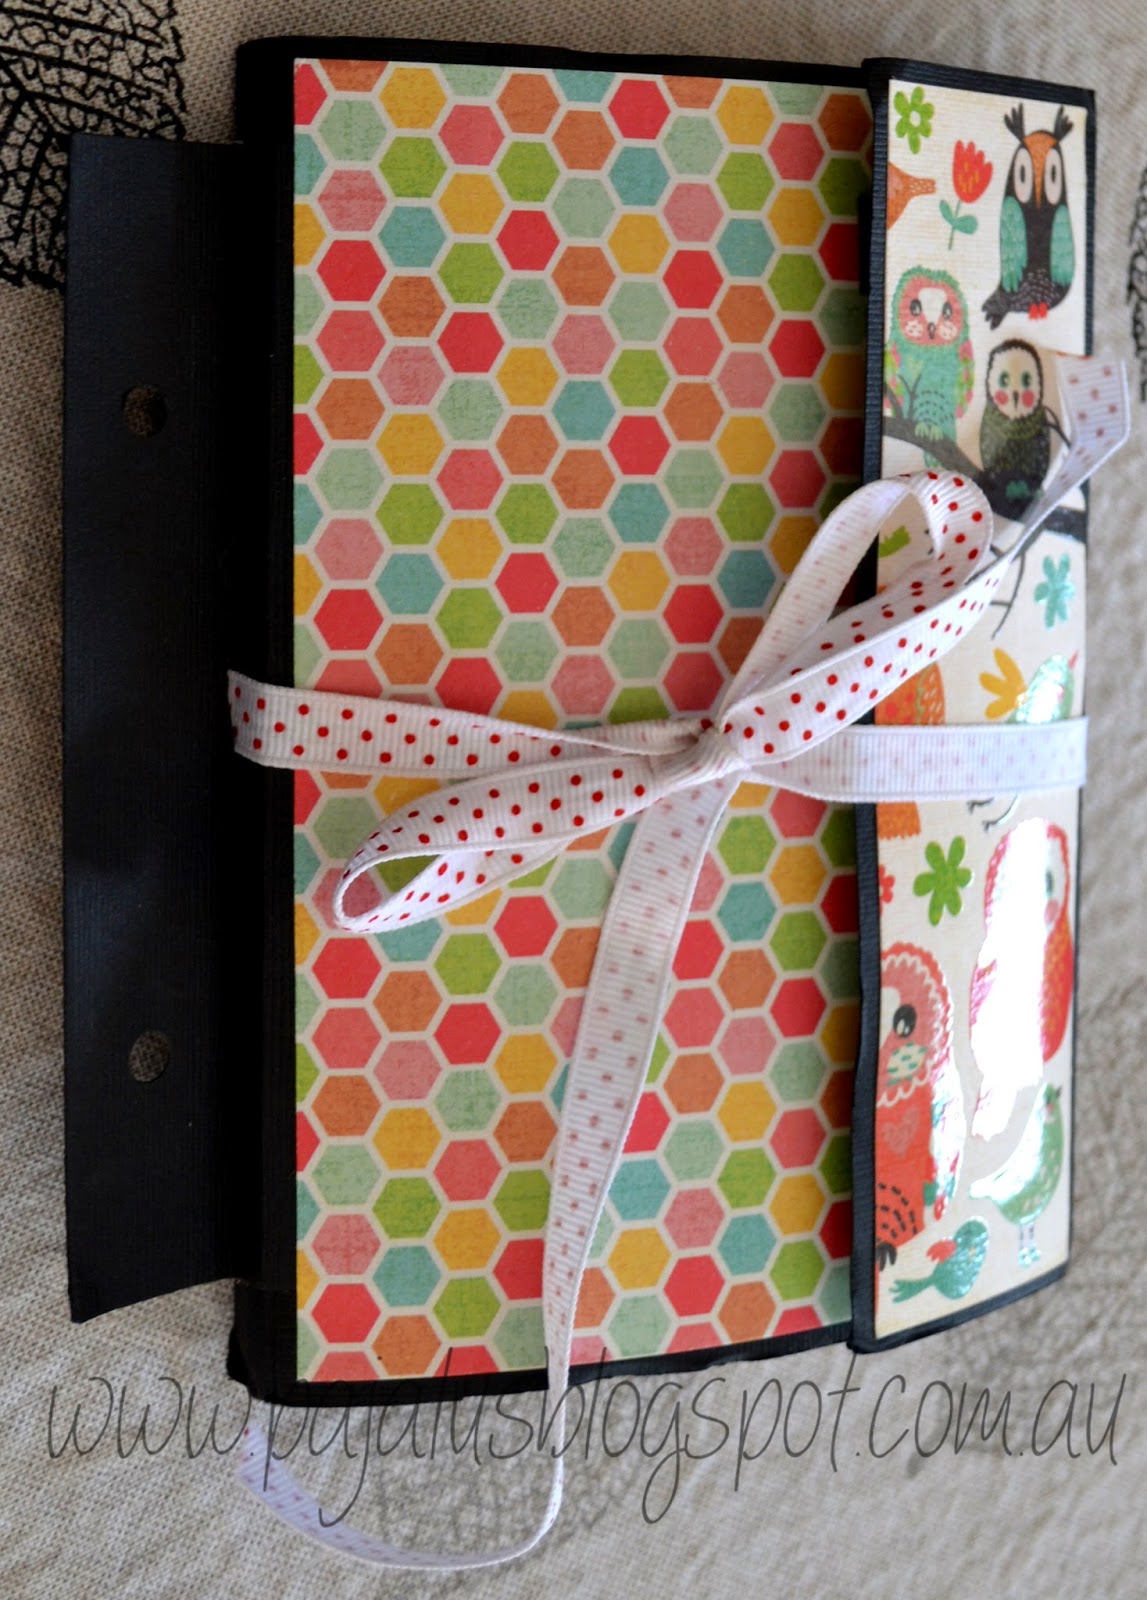
So armed with the amount of money that we can use each week I went to one of my three favorite places - You Tube & looked for budgeting ideas.  Where I happened on some really good vid's.  I now have an envelope system in place & so far it is working well for us.  I actually made a little folder with some envelopes & decorated them up & put my money in them each week (so far it's been about two weeks).  Whilst the actual system is working, my little folder isn't :(.


Let me explain, I love it, but it is way to bulky & awkward to use (for me).  Plus the envelopes can't be separated so I had the money on me all the time.  Which makes it hard if Doug needs to access it. On the plus side, I used up some of my 6.5" pads from Kaisercraft.  A win on that front.  If you look closely the second last photo you may notice a strip of blue washi tape running down the inside flap of the envelope.  It's because the flap started to split apart from the envelope. Also of note, is the three "lumps" under the green strip on the right side.  They are magnets, that would normally work except my folder is so stuffed full of (not money - well not much money) stuff that it wouldn't stay closed properly.  That led to me adding a ribbon to keep it closed, yet another reason why it didn't work to well for me.

So I have changed to a new "envelope" system.


This is what I'm using now.  These clear wallets are the perfect size to fit into this small expanding file.  The three best things about my new system are

  • I can take out the "envelopes" I need & leave the rest at home
  • It's not bulky 
  • I can see at a glance what's inside & more importantly I can keep the coin in the right envelopes.
Which is extremely important for me as I have A.C.D. - Anal Compulsive Disorder (yes I diagnosed myself thank you very much).

Well lovelies,  I'm going to bid you all good day & go harass play with the kids.  Have a great weekend.


Wednesday, February 25, 2015

Labels and Spritzers.

Hi Lovelies,

Yes I'm still on the organizer train.  Today I want to share with you my latest "toy".  I brought this Distress ink Spritzer when I went to CraftOnline.com.au the other week.  I saw it & then had to You-tube it.  I was so delighted to see that it can be used with Copics (my favourite markers).  I also was a happy camper to discover that I could use a water brush with it.  Which meant I didn't have to buy any of the Distress Markers (although you probably saw Picket Fence in one of my last posts pictures).  I made these cute tags with Distress inks I already own.  All I did was "stamp" the ink pad onto an acrylic block added some water, and mixed a little perfect pearls (into Peacock Feathers) and spritzed away.  I really enjoyed making these simple tags.  The inks I used where Peacock Feathers, Chipped Sapphire and Mowed Lawn.  I then used my black Copic to write on the tags, after they dried.  It was a great way to use up scraps of Bazzil c/stock.  I used my Cuttlebug & Spellbinders Nestibilities small ovals as well.

I was lucky enough to find this pretty ribbon in my ribbon jar that is close in colour to Mowed Lawn. I am planning on making more tags as I have so much of this ribbon & more baskets that need sorting and labeling.  I know there is a saying that "Blue and Green should never be seen", but these are my favourite colours and I figure Doug wouldn't care.

Have a great day & happy crafting.


Monday, February 23, 2015

Card organizer - Graphic 45's Time to Flourish


Hi Lovelies,

Last week I went to CraftOnline.com.au to get the rest of these Time to Flourish Graphic 45 papers that my favourite scrap booking store Daisy Chain didn't stock.  I originally brought February, June & August from Daisy Chain, as they are the girls birthday & I know heaps of people that are having birthdays in February (like Arlene).  I then went back for March, April, May & December.  Barbi doesn't stock the whole range of these papers as here in Australia Halloween isn't a big deal (although it's gaining popularity), plus the seasons are all back to front.  January is one of the hottest months so Let it snow sentiments don't really work that well.  But I couldn't resist getting all the papers.  I just love the colours and the imagery is amazing.  I saw this video on You-tube (it's fast becoming my go-to place of late) and knew that it was exactly what I wanted to do.  But I will admit I wanted my organizer to be sturdier.  So I used French Vanilla Bazzil as my pages & then decorated them before using my Zutter to bind it.  In all of the pockets are the "leftovers" that I haven't used to decorate the pages with.  If you look at June (it's one of my favourite pages) below you can see what the page looks like when the pocket is empty & the Month card front.  On the back of these cards I'm going to have a perpetual month.  So it can be used time & time again,  The only thing I would do differently is use bigger rings.  I used the 3/4 binding rings & the book doesn't sit flat, it lifts up at the open side.  


I'm not sure where this gorgeous book will end up.  I'm planning on using the leftovers & the other pages from the pad (yes I caved & brought the pad lol) to make cards to put into the pockets.  I will ever turn it into a teacher gift or maybe give it to Doug's mother for her birthday or Mothers' Day.

Either way I'm sure it will have a great home.

Have a wonderful day & happy crafting.


Friday, February 20, 2015

Some more Organizing hacks

Hi Lovelies,

Today I want to share with you how I store my Distress Ink Daubers.  It's nothing fancy but it works for me.


If you look closely at the last photo in the bottom right corner you can see my "Before" shot.  I've been using a Cotton reel rack (not sure of the correct name) to store my daubers for awhile now.  It worked well but because the daubers had a bigger hole (where your finger goes) they tended to wobble around on the prongs.  Which meant quite often I'd have to turn them all around to find the colour that I wanted.  Because I'm anal and label everything I found this time consuming & really annoying.  So today I came up with a "quick fix" which is cheap.  I went to my bathroom, grabbed these make-up pad removers, (These last me years as I very rarely wear make-up), some sticky tape & scissors.  I cut each pad into four, then I stuck them down with the tape (wrapping the tape around the prongs).  I think this took me about ten minutes to complete.  End result is the daubers sit better on the prongs & I can now see what the colours are.

Do you have any cheap & easy storage ideas?  I'd love to hear/see them.  I'm trying really hard to use up my stash of crafting supplies.  I want to empty out my craft room & start again.  I know this sounds silly, because I've only had my craft room set up for two months, but I had an area about four times the size I have now.  So I really need to get organised & sort out what I really need from the "Why the heck did I buy this?"  Lately I seem to be doing a bit each day of the re-organizing & luckily for me I can donate a lot of my excess/don't wants to the school.  As they can always use it.

Have a great day & happy crafting


Thursday, February 19, 2015

Thursday Share

Hi Lovelies,


Today is just a quick share day.  I made these cards over a week ago & have only just gotten around to sharing.  I used leftovers from three sheets of 12" x 12" of p/paper.  If I was organised I'd remember to write down what brands they where.  I haven't stamped on either of them & the sentiment from the second one is a die cut, to which I then added Star Dust Stickles.  I also added Star Dust Stickles to the white leaves of the flower card.  I found some green pearls and coloured the centre of a Kaisercraft paper flower the same as the flowers on the paper. These cards probably took a whole five minutes to put together.  I decided not to add a sentiment to the first one as I couldn't make up my mind what I wanted the card to say.

Have a great day & happy crafting.


Tuesday, February 17, 2015

Captain Rogers, yes please!

Hi Lovelies,


 Today is my birthday - Happy Birthday to Me ;p.  So guess what I got.  Yup a plumber, no you didn't guess that?  Oh okay.  Yeah I wanted a plumber for my birthday & no not a stripping kind of one either (dirty minded much?).  Since we have been in our dream home the toilets haven't been user friendly.  The one in our en-suite takes up to eight hours for the cistern to fill again.  So I have a bucket that I fill from the shower to flush this loo.  The other toilet has button issues.  They are really hard to push (even for me and according to Doug I know how to push buttons).  So the girls have no chance of flushing.  Doug complained that he didn't know how to gift wrap a plumber.  Silly man.  But at least he came good & rang one, so now I have a plumber on order.  Just wish I knew what day this week he's coming.

I also got Captain America - The First Avenger (in 3D) so guess what I'm watching after the girls are all tucked up in bed.  When I say watching I really mean whilst I'm crocheting (see earlier post).  I was given this DVD on Valentines Day (love the wrapping paper - yup it's the bag from the shop lol) along with a gorgeous rose & some chocolates but I've been a goodish girl and only watched this once (or twice) since it was given to me.  Yup I'm one of those people that love to watch the same movie over & over.  All I need now is Cap. America Two, Iron Man Two & then the new Marvel movies when they come out & I will be in Marvel Heaven.  Love all the Stan Lee cameos. Well I had better go as my inner Geek/nerd is showing.

Happy Crafting everyone.


Monday, February 16, 2015

Crochet fun.

Hi Lovelies,

Well today is a Monday so I've been at the Tuck-shop, dropped off/picked up the girls and we've gone to Karate.  Emsy "hates" it, until we get there & then seems to enjoy herself.  We (by that I mean me mainly) have to push her to go.  She has lessons at the back of Buderim about half an hour from where we live.  Lils loves going, as there are some other young kids there to play with as well as a playground.  I get to do some "Out and about" craft done.  I have been teaching myself how to Crochet from You-tube.
I have made each of my girls "Knee Rugs".  I used these videos to make the flowers Video 1, video 2, video 3.  I used this video for the granny square and this video for joining them together.  Then decided to make myself one with some of the left over wool.  I take my bag of bits & bobs when we go out to places like Karate or Lils swimming lessons.  I hate not having something to do & this stops me from playing on my phone & racking up a huge bill because of the data that I use to play Hay Day - darn addictive time wasting, but oh so much fun game.  Originally I was making this for my sister, because my ferals, er kids decided that I should.  But I really like the colours so sorry sis this one's mine.   Maybe the next one will be yours.

Have a great week everyone & happy crafting


Sunday, February 15, 2015

Organised - maybe not.

Hi Lovelies,

I just realized today that it's been awhile since I last blogged.  I got so side tracked with life, crafting & school that I forgot to take time to blog & lets not mention all the photos I haven't taken of my projects to so I could share with you all.  I dislike taking photos of my stuff as I never seem to capture it well.  Thank goodness for Gimp I say.  ;p

I have come to the conclusion that I'm not going to beat myself up over these "lapses" or that I seem to be going off in a completely different direction with my craft at the moment.  For this year I am going to try to adopt a more relaxed attitude to life in general.  I am not going to put pressure on myself to enter card challenges or have something to blog about.  

I've just spent the whole afternoon taking heaps of photos of things I've been doing (that are still here), editing these photos and turning most of them into colleges.  That is in between referee-ing the ferals, er kids.


Here is a picture of said kids.  Lils is so proud of herself as she put her togs (swimmers) top on by herself.  I didn't have the heart to tell her it is side-ways.  Hence the funny look of the top or the nipple peeking out lol.  It has cross over straps which make it so hard to do.  I figure she gets points for trying.

We are about to start our fourth week of school - my how time is flying by.  I've now got a routine of sorts happening.  Mondays I spend two hours in the primary school tuck-shop after dropping the girls to their classrooms.  Last Monday I iced around fifty cupcakes among-st other things.   Wednesdays I'm helping out in Lils' class with finger gym.  It only takes about half an hour & the kids love it.  It helps build up muscles in their fingers to help them grip pencils.

Our after school stuff is on Mondays & Thursdays.  Emsy has Karate on Mondays & Lils is still doing swimming lessons at the public pool on Thursdays.  Where I catch up with some of the other NCC mums, it's like we can't stay away from each other.  I'm guessing as the year goes on it our week will only get fuller with stuff.

With that in mind, I'm getting slowly organised.  It started out with my (very small) craft room.  I turned a cereal box into a desk top caddy, to hold my tapes, foam tape, card bases, pens and pencils. I now have three caddies if you include the mini scrape tote & the wire basket that holds my pens, glues, scissors, two handled punches and a ruler.   I used up some more Kaisercraft six and a half inch pads to do this.  Then I added some die cuts to it (from Daisy Chain).  I also did the same to an empty envelope box and put my paints in it.

For the girls I've been trying to get super organised.  They each have their own cork board.  Emsy's I did about three years ago.  Lils' I did last week, all I've done for it so far is paint the border.  I am going to get some wooden letters for her & will decorate them.  Each girl has a "Weekly" sheet, and a pouch.  On their weekly sheet they have what uniform they are wearing each day. (Emsy has three different uniforms & Lilly has two).  They also have a few everyday jobs they have to do.  I've also left spaces for their homework to be kept here.  So it's not conveniently lost.  For Lilly I've also added a weekly spot for her letters & word of the week.  So we can practice at home.  I wrote on a yellow (Lils favourite colour) c/stock the Week, Slow letter, fast letter & word then covered it with clear plastic that wipes clean & stuck it to the outside of her pouch.  This way I can look at it at a glance, to see where we are at. I love that white board pens work so well on this plastic.

I've even given myself a house work roster and have since discovered I'm not the only one to do this, if YouTube is to be believed.  I don't feel like a dolt now.  I still have a long way to go before I feel that I am there (where ever there is).  But from what I've been discovering on You Tube, anything is possible.  I especially like that there are so many people are just like me.  I really love all the thrifty ideas.  I may have to start going to the charity shops again.  Not just the back dock where I've been dropping off my dontations tee hee.

Well the girls are back in the pool, so I'd better go be a good mum and supervise.


Tuesday, February 3, 2015

Practice piece

Hi Lovelies,

Toady I thought I would share with you an image that I coloured the other day.


I'm sorry about the shiny spots on this image.  I'm having "issues" with photography & my laptop.  Not sure what's going on.  After watching this video on YouTube I decided to have a go at doing the background of this Saturated Canary image.  I then went on to practice my shading with my Copics as well a using colours.  I'm trying a few different things here.  The hair combo is ok but am not sure it works that well.  Admittedly it does look a bit better in real life.  I do love the other colours.  Especially the red apples.  As I have yet to get some more Red Copics that I can put together easily. On the plus size this isn't that bad that I can't use it on a project of some sort.  I am also really pleased with how her face came out.  I had a go at shading around her nose area after watching this video.  I even tried the way she has done her eyes.  

Supplies:

Copic paper
Saturated Canary Digi image - Snow White
Copics:
Apples: R02, R05, R27, R29, R59, YG23, YG17,YG67,E25
Skin: E0000, E50, E00, R22
Lips: E04, R22,
Eyes: B00, B01, B02,B06
Basket: E31, E33, E35, 57
Hair: Y23, E31, E33, E35, E79
Dress: BG01, BG05, BG07, BG09, V000, V01, V04, Y11, Y02,Y06, Y08, YR68

Monday, February 2, 2015

Washi tape & Copics


Hi Lovelies

Today I'm back to share a card I made for this CAS(E) Sketch challenge.


I love sketches as you know.  This one was such fun to follow.  I decided to use some Washi tape to make the stripes behind the stamped image.  Then inked the edges just to give it some more definition.  I had pre-stamped a bunch of images onto Copic paper ages ago.  So decided to do some colouring.   I've been playing around with colour & shading.  I have found such great pins on Pinterest & blogs as well.  I have a board devoted to Copics Colour of the day by Jennifer Dove & you can see it here.  I have a couple of other boards dedicated to Copics & colours as well.  I did make a mistake on the image & had to add the bow to cover it up.  I figure with all these books & movies around at the moment involving archers, I'd be ok.   I then added some dots for the background & they didn't turn out as well as I'd like.  Now that I've you tubed dot background tutorials I hope to get better.

Have a great day & happy crafting.


Sunday, February 1, 2015

Back to School

Hi Lovelies,

Well it's that time of year again.  My babies are now big school girls :(  Emsy started grade three on Wednesday & Bill went on Wednesday so she could get a feel for Prep or "Big School" as we have started calling it.  Then Bill had Thursday off & came back on Friday to find out her class/teacher.  She starts full time Monday.  So both of my babies aren't babies anymore.  I can't believe how time has flown by.  It only seems like last week she started Kindy.  Now she's at school five days a week.


Don't you just love the look on Bill's face.  I wish I knew what she was thinking.  I think Doug interrupted her & Emsy's bonding time over a Captain Underpants book.

Lilly really did want to go school as you can see here.  Emsy looks older than eight don't you think?


Here she is with her teacher Mrs Diggines (who was Emsy's Prep teacher) in the top photo & with one of her mates Liana (pronounced Lee-arna) who she went to Kindy with.

I also can't believe that January has nearly finished.  It seems like the new year was only a few days ago.  I think this year is going to be a quick one.  I do hope that the rest of summer doesn't have really hot days.  Our ducted air con has broken & isn't covered by our insurance.  Apparently Motor Burn out is extra.  I wish I knew about it when we where setting up our insurances.  I now have to wait till November to add it to our policy.  It will probably take us that long to save up the money to fix the problem.  Pity I can't sleep in the pool tee hee.


Friday, January 30, 2015

My first challenge entry for 2015

Hi Lovelies,

I've been a little distracted from blogging lately.  Mainly because it's so freakin' hot!  Which normally wouldn't be that bad except our air con has died. Some of the nights have been in the mid 30s C (or around 89 F) with high humidity added just to make it unbearable.

So today I decided to make a card.  Which meant I have a chance to play along with a favourite challenge blog this week - Yay!!  I decided to choose a random blog & came up with Retro Sketches.  This is the sketch I decided to follow


I decided to use scraps of patterned papers lying around on my desk to make this card.  Admittedly I'm not a fan of orange, but for some reason lately it's featured in a few of my projects.  No stamps or inks where used in the making of this card.  Now I'm sort of regretting not inking around the edges of the banners, just so you can differentiate between them.   I also added an extra butterfly to the card.

Supplies: 

Card Base
Cuttlebug
T.W.C Die - Hello 1036
Spellbinders Nestibilities - Nested Lacey Pennants
Impression Obsession Dies - Butterfly set
Memory Box - Effera Butterfly Wings 98863
                         - Rhone Butterfly Wings 98869
Studio Calico - Hey Day pattern paper pad 6"
Pebbles - Seen & Noted pattern paper pad 6"


Tuesday, January 20, 2015

Cruisin' the 'net is fun ;P

Hi Lovelies, 

Yes it's share time again.  So far I've been cruisin' around the internet & get inspired by YouTube.  There are some truly amazing crafters out there.  I've been inspired by them to create some "Wow" & fun projects.  Always a good thing.  Today's share is of one of them.

Firstly you need to go here, here, here, here, & here.  This is where I got the "how to" to make this version.  I love, love how this Note card Folio turned out & so easy.  There is no stamping on this project & the only thing that I die cut myself is the hello on the front, then I used a Fiskars' Border Punch on the front flap.  Using The Crafters Workshop die TWC 1036 Hello.  All of these papers except the bazzil dot c/s came from this pad.  


The top right photo is of a "Belly Band" I made to keep it all closed.  I added it, as I thought it would make it easier to keep tidy, ribbon would have worked just as well.

Whilst making this project I had a "Light Bulb" moment (spoken just like Gru).  I added glue to the back of my die-cut Hello whilst it was still in the die.  I just added the tiniest bit & because it was still in the die it was so easy to apply.  Then I used my hook tool (handle with a pin on the end) to gently poke/lift it out of the die.  No more mess! YAY :)  Not sure if anyone else has discovered this, but thought I'd share anyway.


Today I'm sitting outside under our pergola watching the kids swim.  Life is great.    


Sunday, January 18, 2015

Two cards.

Hi Lovelies,

Well it's another hot but beautiful day here on the sunny Sunshine Coast.  According to my phone it's 32C here at the moment.  Which converts to  89.600F (on this site).  There isn't any humidity at the moment so with a light breeze blowing it's just lovely.  Especially after swimming in our pool.  

Today I want to share some of my creations over this last week.  I've been super creative with this gorgeous paper pad.  Usually when I buy them, the pattern papers (especially the super busy ones) confuse me & I tend to use them as mats on the backgrounds of my cards.  Never really as a feature.

I used some of these papers on this card.  So today I thought I'd share with you two more cards that I made.  On this first card I used some of the busier pp for the background.  I also fussy die cut the green pp so it looked a little like clouds.  I thought it added extra interest instead of having it plain.  The banners & die-cut are all from this pad.  All I did was ink around some of the edges with Festive Berries & Bundled Sage Distress Inks.  The butterfly & sentiment were stamped in Versafine Sepia Brown.  The butterfly was stamped twice & fussy cut out to adhere to the panel. 


On this card I used up some of the scraps that where left over from my other projects.  I'm not 100% happy with this card. As I don't like a lot of white space on my cards.  I guess it's something I will have to try more often.  It's like my use of orange.  I tend to avoid this colour for some reason, but on these projects it seems to be every where.  


Supplies:

Kaisercraft 
  • Cherry Blossom 6.5" pad 
  • CS 915 Mother
  • CS 861 Botanical Garden
  • CS 870 Remember Me
Hero Arts 
  • CL 297 Everyday Sayings
Die-namics
  • Pierced Rectangle Stax
Cuttlebug

Ranger Distress Inks
  • Bundled Sage
  • Festive Berries
Card base